Showing posts with label Dinner. Show all posts

Saturday, January 30, 2010

Portuguese Chicken Rice

Today Mr. K felt like having Portuguese Chicken Rice (葡國雞, Galinh a Portuguesa), its a mild coconut curry served baked with cheese and dessicated coconut. If you can, please go to Macau to try the real deal :)

As for us, who had the sudden craving, we had Portuguese Chicken Rice for the first time. The recipe is actually not as complex as I thought. I combined the recipe from my Dad and used paprika and tumeric on the chicken (see Sunflower's Blog). Before, the chicken was good but lacked a bit of texture. Coating the chicken in the flour mixture before frying gave it a bit more flavour and character. You would eat the chicken and the curry rather than just having the curry with chicken inside.

Ingredients
  • 7 Garlic Cloves
  • Ginger
  • 900g Chicken Pieces (cut into bite sized)
  • 1.5 tablespoon tumeric, 2-3 tablespoon paprika, 5 tablespoon flour
  • Cacciatore or chorizo cut into small bits
  • 1 Leek or 2 Onion (or both)
  • 1 Celery stalk
  • 1 can of chicken stock
  • 1/2 tablespoon sugar, 1/2 tablespoon salt, 2 tablespoon curry powder
  • 2 tablespoon butter
  • Coconut Milk (400 mL)
  • 2 Potato (If frying, keep half unfried to add into curry in the beginning)
  • 2 Carrot (If frying, keep half unfried to add into curry in the beginning)
  • Whipped Cream (300 mL)
Preparation
  1. Marinate chicken with salt and pepper for 30 minutes.
  2. Mix tumeric, paprika and flour in a plate and coat chicken with it
  3. Fry chicken for a short while. This is just to sear the chicken.
  4. (Optional) Fry potato and carrot if preferred to add into curry later
Method

  1. Heat pan and add garlic and ginger until fragrant
  2. Add cacciatore or chorizo
  3. Add leek and onions. Cook til almost soften
  4. Add potato, carrot, celery and chicken stock
  5. Add curry powder, salt and sugar. Can vary the quantities to your liking.
  6. The liquid should cover all the contents (2 parts water and 1 part 'stuff), add water if not enough
  7. Add butter for flavour
  8. Cook on medium heat to reduce for about 10 minutes
  9. Add chicken and coconut milk and cook for another 10 minutes on medium heat
  10. Add remaining vegies (already pre-fried ones)
  11. Use cornstarch (3 tablespoons cornstarch, 1 tablespoon of water) to thicken if required
  12. High heat and bring curry to boil
  13. Stir in cream at this stage if you prefer a richer, creamier curry
  14. Don't need to boil again, just take it off the stove and serve
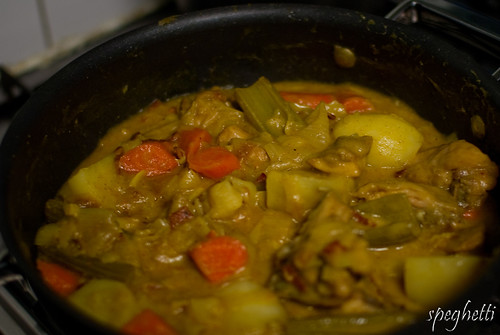
The curry turned out a bit too sweet as I added too much sugar at the start. As the curry cooled down it became sweeter than before. The sugar quantities I have listed contain about half of the sugar that I used on my first try so hopefully this will bring about better flavours.

Friday, January 30, 2009

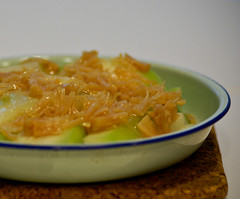
Steamed Hairy Gourd (Hairy Melon) with Dried Scallop Sauce

This is a very simple and healthy dish passed on from my mum. It's something I've had since little and one of the easiest mum recipe dishes :)

Hairy Gourd has various names (see Victoria Agriculture site) and is widely used in Chinese cooking for soups and dishes (mainly steamed and stir fried). It's always a more 'saucy' dish, it is plain and simple, but has a subtle sweetness to it which makes it a perfect option when you're after something light..

To the recipe...

Ingredients
  • Hairy Gourd
  • Chinese Dried Scallop (soaked overnight)
  • 2 tsp cornstarch mixed in 1/4 cup of water
Method
  1. Soak the dried scallop overnight so they soften.
  2. Slice melon into medium chunks, it depends how you like it. If you're running low on time, slice it thinly so its quicker to steam.
  3. Steam the melon til its soft, you can check by poking a chopstick through it.
  4. Heat up the wok, add the scallop and also the water it was soaking it.
  5. Add some sugar to taste
  6. Add the cornstarch water to thicken the sauce
  7. Pour onto the melon and serve


    image name

    Monday, January 19, 2009

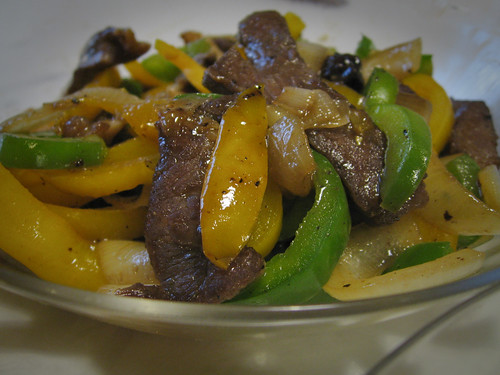
    Stir Fry Capsicum and Honey Pepper Beef

    Chinese is our staple dinner almost every night. I had tired to learn my favourite mum recipes when I first moved out by myself a few years ago. Since then, I've been lucky enough to cook up a few of my own :) Nothing too extravagant, just nice and homely :)

    Tonight's dinner was a combination of some left overs, chicken soup, stir fried bean sprouts and capsicum beef. Its usually what I can cook up from a few specials we find in the markets. The winner of the night turned out to be the capsicum beef stir fry with beef in honey pepper sauce.

    Ingredients
    • About 250g of beef
    • 1 yellow capsicum
    • 1 green capsicum
    • 1/2 onion
    • 2 tablespoons of Honey
    • Cracked black pepper
    • Salt
    Marinade
    • 2 tablespoons soy sauce (light)
    • 1/2 teaspoon of sugar
    • 2 teaspoons of cracked black pepper
    • 2 teaspoons of cornstarch
    Method
    1. Slice the capsicum into thin slices (1cm) and the onion into slightly thicker slices (1.5-2 cm).
    2. Slice beef into thin slices about the same width as the capsicum
    3. Marinate the beef for about 20-30 minutes.
    4. Heat Wok, add 1 tablespoon of oil.
    5. Cook onions first til slightly soft then add capsicums. Add 1/2 teaspoon of salt.
    6. Cook for about 3 minutes til the vegies are half done and take them out.
    7. Clean the wok and heat it up again.
    8. Add 1 tablespoon of oil, seal the beef. Keep tossing it to stop it from burning on the wok.
    9. Once the beef are sealed (just on one side is enough), add the vegies and toss together.
    10. If you find its too dry, add about 2 tablespoon of water and put the cover on.
    11. Once beef is cooked, add honey and cracked black pepper to taste.
    12. Dish up and serve :)

    image name


    I had to slice up a nice piece of scotch fillet steak as I didn't have any beef fillet handy at home. It turned out just as nice, if not better :) The whole cooking process only takes a few minutes. I followed my mum's stir fry principle which is:

    "cook the vegies; add some salt -> take it out ->
    cook the meat -> add back the vegies -> serve it up"


    The only problem was that by the time I had finished cooking, we were pretty famished and there was not really much time to take out the DSLR. Though our little canon point and shoot does an "ok" job, it feels like there is something lacking in the photo. I wonder how I can make a chinese dish look good on camera, especially if it's stir fry so all the bits and pieces are tossed together...

    Friday, January 9, 2009

    Mint Peas


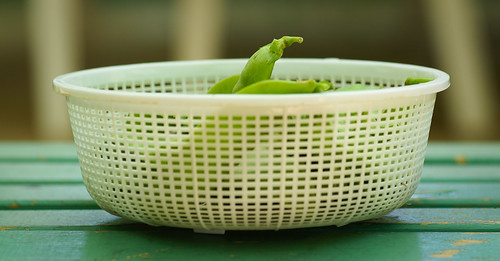
    Today we are going to have pasta and being the Chinese brought-up me, I have to have some vegies on the side otherwise dinner just doesn't seem like dinner. There was nothing much apart from a packet of peas left in the fridge as we did a good job at cleaning up the left overs from Christmas and New Years.

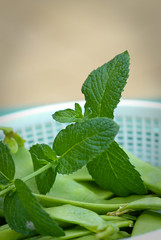
    I started thinking what would go well with peas and that we have around the house. I wanted something light as we have been having a heatwave of 37 degrees celcius here in Perth. My mind wandered to our mint plant which had been under utilised since last year and the leaves had just been looking at me for the past few days :) With some web surfing, I made some modifications to this recipe on the
    eHow website:


    Ingredients
    • 1 Tbsp of Finely Chopped Mint Leaves
    • 1-1.5 lbs of Fresh Sugar Snap Peas (I had normal snow peas only)
    • 2 Tbsp of unsalted butter

    Method
    1. Wash and snap of ends of the peas. I also peel of the fibre on the sides.
    2. Boil peas in boiling water (add a bit of salt to it) until its cooked but still crisp
    3. Cool peas in a colander with running water, you can use ice
    4. Melt the butter in skillet over medium-low heat, add the peas and half the mint.
    5. Add some salt and ground black pepper to taste


      I only used half the mint from the recipe as I didnt want it to be over powering. The fresh mint from the garden was very fragant, I noticed the flavour was stronger if I shredded them right before adding them to the peas :)


      We served the peas as a side with some light pesto pasta and chicken from Lenards ~ yummm ~